How to Install a Wireless Card in Linux Using Windows Drivers
Posted on February 21, 2011 • 3 minutes • 549 words
Linux has come a long way with hardware support, but if you have a wireless card that still does not have native Linux drivers you might be able to get the card working with a Windows driver and ndiswrapper.
Using a Windows driver inside of Linux may also give you faster transfer rates or better encryption support depending on your wireless card.
If your wireless card is working, it is not recommended to install the Windows driver just for fun because it could cause a conflict with the native Linux driver.
Download Wireless Card Driver
The first thing you need to do is figure out what wireless card you have. There are a couple ways to do this and some involve finding the device chipset and others involve scouring through system logs.
The easiest method is to just look at the device itself, if you have an external wireless card, or search your manufactures website for what wireless card came with your computer, if you have an internal wireless card.

Once you know what wireless adapter you are trying to install, go to the manufacturer’s website to download the Windows drivers for the device.
If at all possible, you should try to download the 32-bit Windows XP drivers in .zip format rather than .exe. If you don’t have an option, select the latest Windows driver that your manufacturer provides.
Extract Wireless Driver
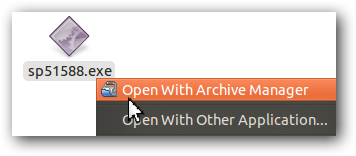
To extract the files, browse to the .exe or .zip file, right click on it, and select open with archive manager.
Note: Although archive manager can extract both .exe and .zip files, sometimes the files within the .exe may not work with ndiswrapper.
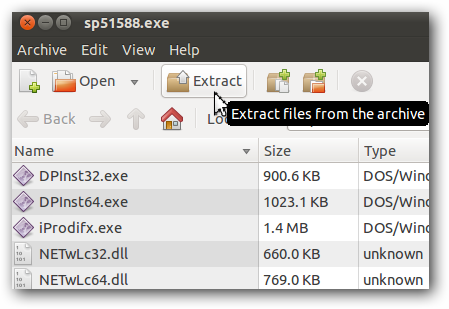
Click extract at the top and copy all the files to an easy to find location.
Install Ndiswrapper
Ndiswrapper is the tool that allows Linux to use Windows drivers for wireless card support.
To install it in Ubuntu go to the Software Center and search for ndisgtk.
Note: Linux Mint comes with ndiswrapper installed.

Install Windows Driver
Now that you have your wireless driver extracted and ndiswrapper installed, open Windows Wireless Drivers from the System -> Administration menu.

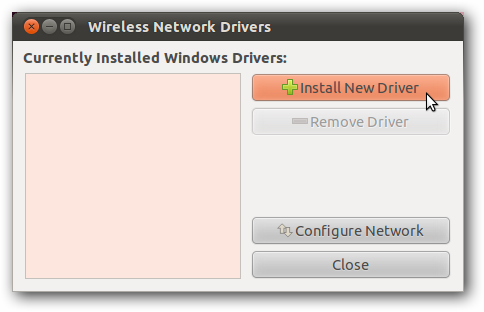
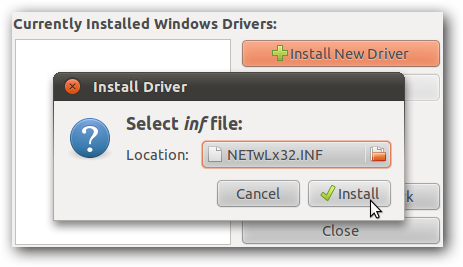
In the window that opens, click on install new driver and browse to where you extracted the driver.
Sometimes the .inf files will be in sub-folders inside the driver so you may need to dig around to locate the right file to use.
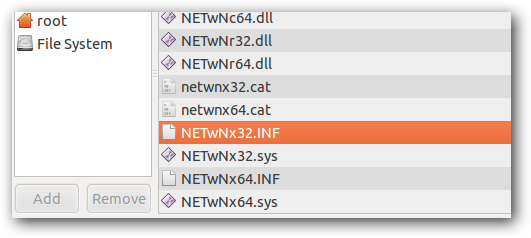
After you select the .inf file for your wireless card click install. It will take a couple minutes to install the driver so be patient while it works.
After the driver is installed the main window will indicate if you selected the right .inf file by telling you if the hardware is present or not. If you selected the wrong driver the first time you can try installing a different .inf file that was extracted from the driver.
If none of the .inf files work you may want to try the driver for the same card for a different version of Windows (e.g. XP, Vista, 7).
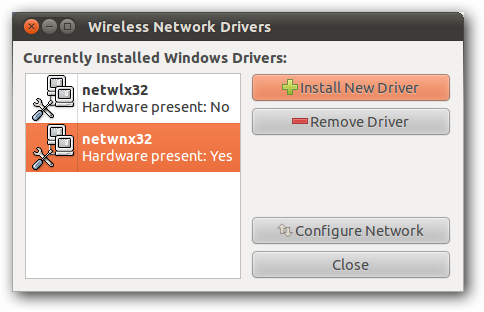
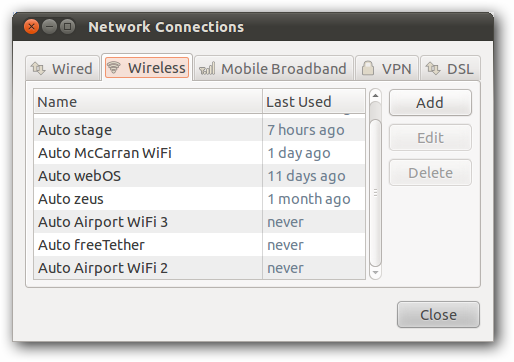
After you get the right driver installed click configure network to open Ubuntu network connections and connect to your wireless network.
If you are still having trouble you may want to check out the ndiswrapper wiki to see if others have had success with the wireless card.
