Four Ways to get Instant Access to a Terminal in Linux
Posted on July 19, 2010 • 5 minutes • 1007 words
If you have ever found yourself in need of a terminal available at all times in Linux, here are four different ways you can bring up a terminal with a maximum of three buttons.
Keyboard shortcut
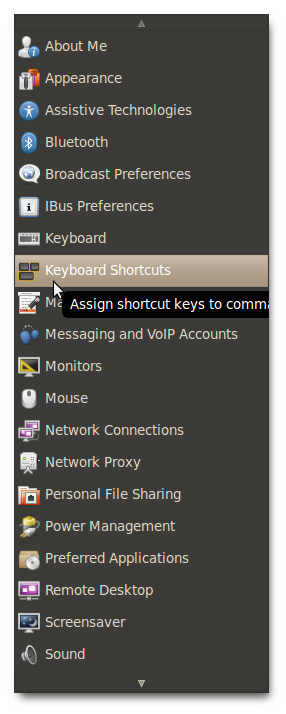
By default in Ubuntu and Linux Mint the terminal shortcut key is mapped to Ctrl+Alt+T. If you would like to change this to something else that makes sense to you open your menu to System -> Preferences -> Keyboard Shortcuts.
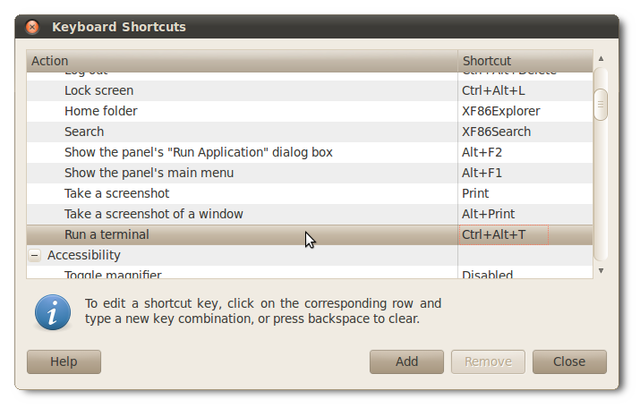
Scroll down in the window and find the shortcut for “Run a Terminal”. If you would like to change this setting click on the shortcut column and push the new keyboard shortcut you would like.
Right click menu
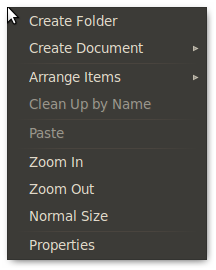
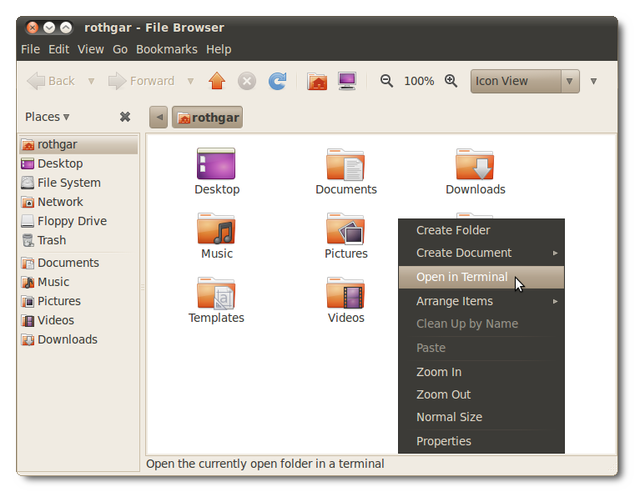
If you constantly find yourself opening a terminal and then browsing to the location you just had open in Nautilus, you can install a package to get access from your right-click menu.
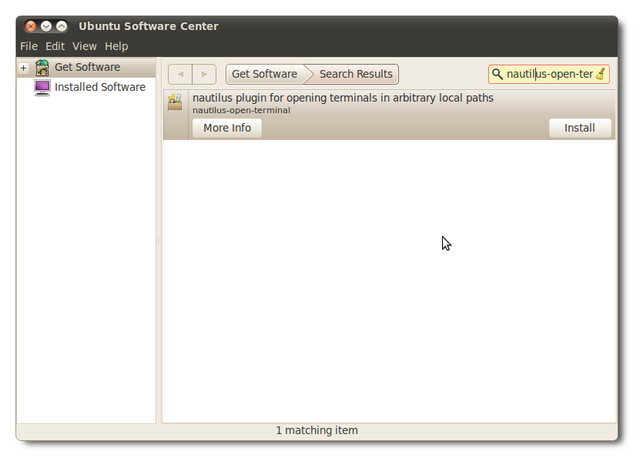
To install the package just open the Ubuntu Software Center and search for nautilus-open-terminal. Install the package and then log out and back in to restart Nautilus.
Note: This package is installed by default in some distributions so it may already be there.
Now just right-click on your desktop or inside any folder to open a terminal directly to that folder.
Drop down terminal (Quake style)
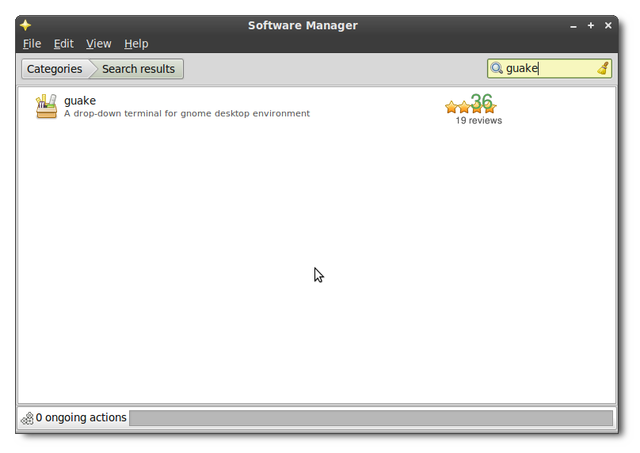
Guake is a drop-down terminal that will give you easy access no matter what you are doing. To install Guake open the software center and search for guake.
Note: If you are using KDE Desktop Environment you can install YaKuake for the same effect.
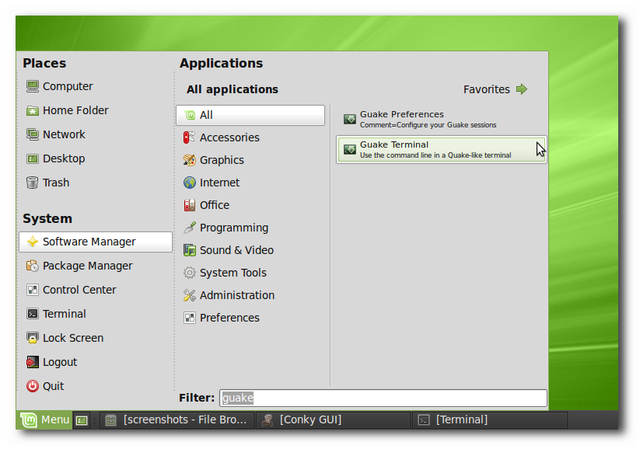
Once Guake is installed open your menu and launch “Guake Terminal”
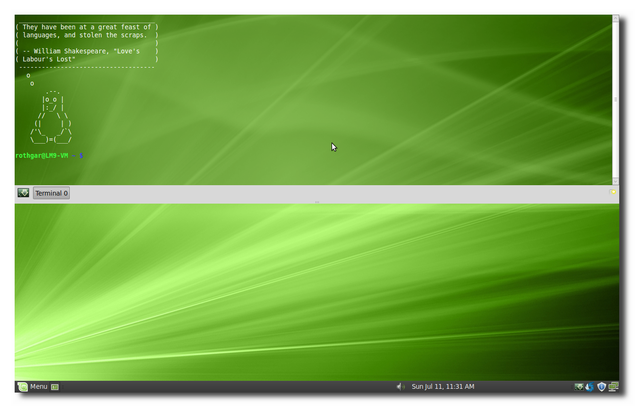
Give it a test by pushing F12 on your keyboard. You should get a drop down terminal that will be on top of all of your other windows. If you push F12 again the terminal will roll up and get out of your way.
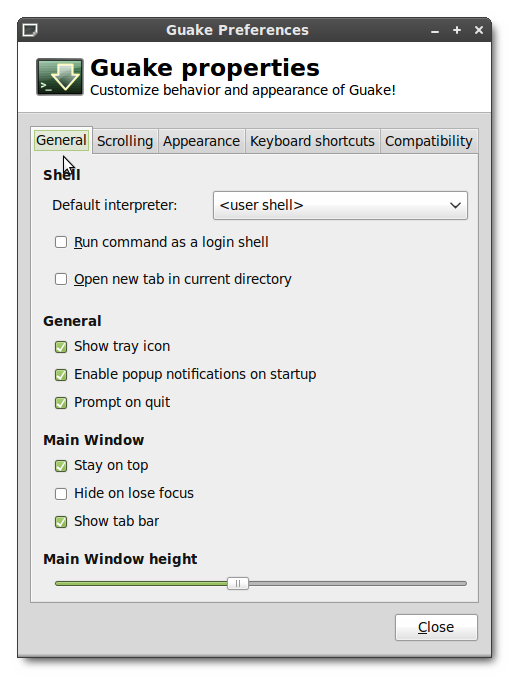
You can change the available preferences by right clicking on the tray icon and selecting preferences.
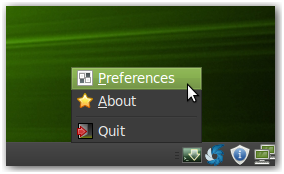
You can change the keyboard shortcut, how tall the terminal window is, when to hide the terminal, and a whole lot more.
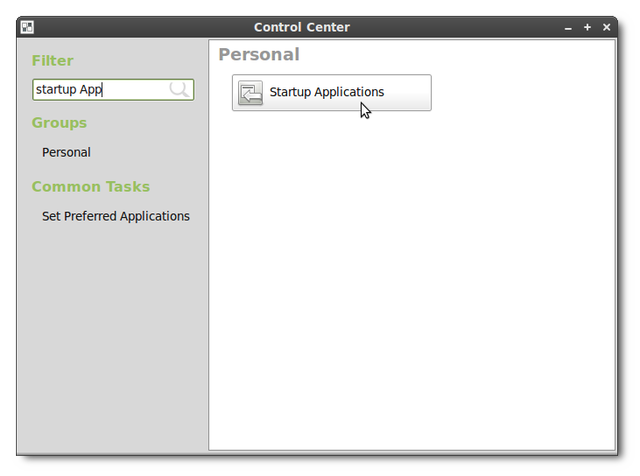
If you want Guake available every time you log in, you should add it as a startup application. To do that, open the Control Center and then startup applications in Linux Mint or in Ubuntu go to System -> Preferences ->Startup Applications.
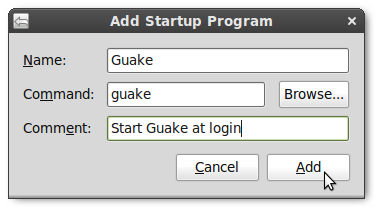
And add Guake as a startup program.
Embed terminal on desktop
The last method to get instant access to a terminal is to embed a terminal right into your desktop. To do this you will need to have a computer that is capable of running Compiz desktop effects.
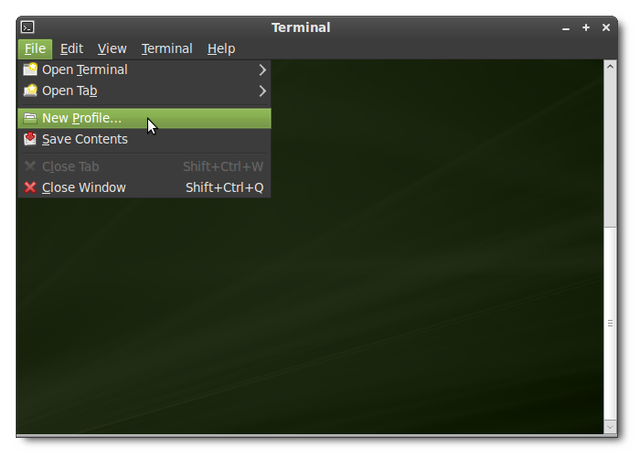
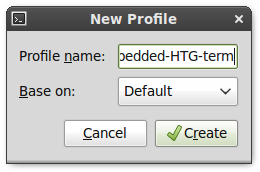
The first step is set up a new terminal profile. To do this open your terminal and then go to File -> New Profile. It is very important to name this profile something unique because the window name is how we are going to identify the window to embed it. We will name the window embedded-HTG-term for this example but you can name it whatever you want.
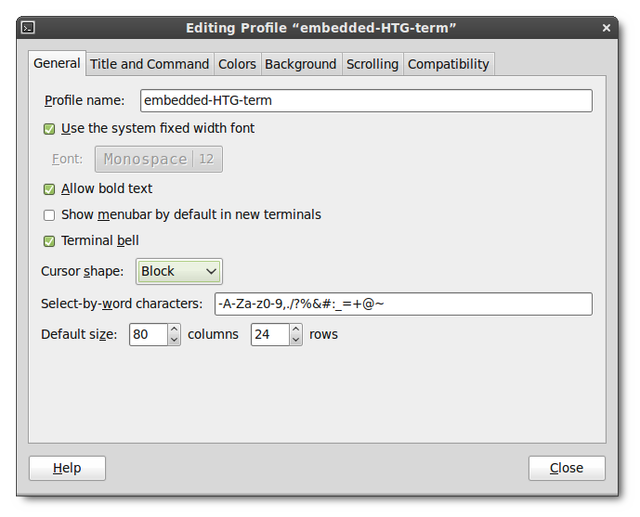
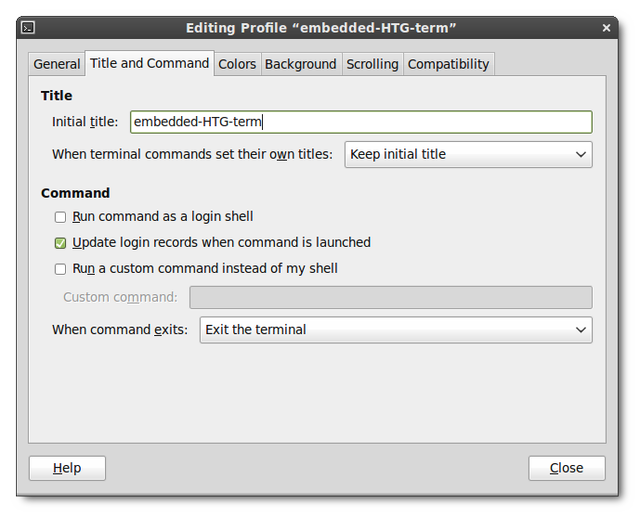
In the profile settings window that comes up change these settings for the new profile we just created.
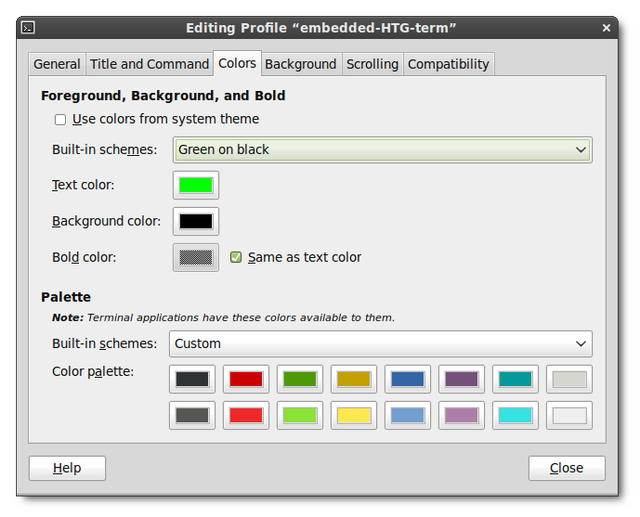
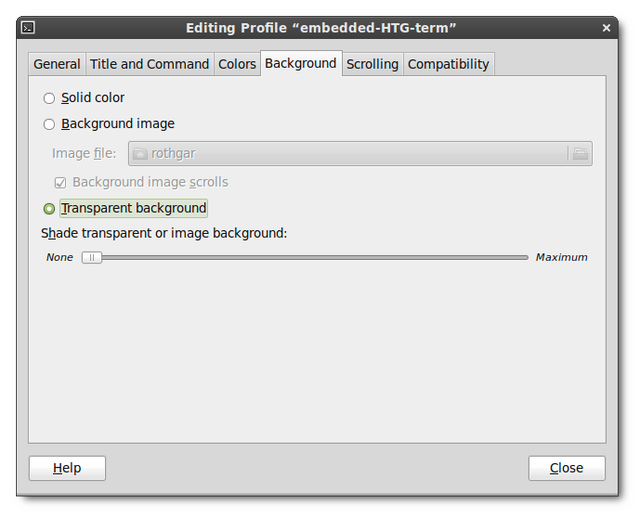
Show menubar: off Initial title: embedded-HTG-term When terminal commands set their own title: Keep initial title Color scheme: Black on white will only show black text on your desktop but you can pick whatever will match your theme/background. Transparent Background: On, Move the slider to whatever level lets you easily see the text on your desktop wallpaper. Scrollbar: disabled
Next go to your Compiz Configuration Manager and activate these plugins if they are not already activated: regex matching, window decoration, window rules, and place windows.
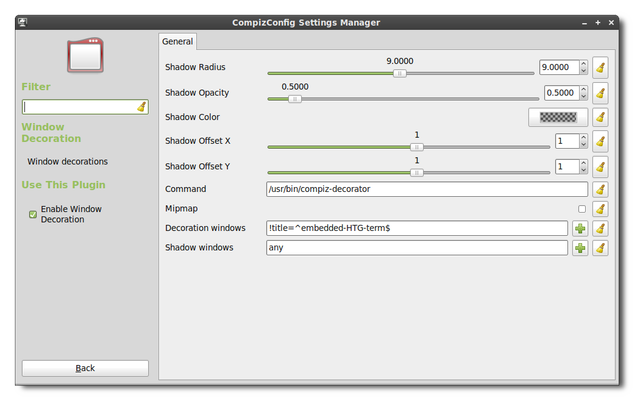
Under window decoration add !title=^embedded-HTG-term$ to the decoration windows option.
Note: ‘!’ means to exclude this window, ‘^’ means nothing can come before this title, and ‘$’ means nothing can come after this title. This makes it so that if you were to search in Firefox for “embedded-HTG-term” your Firefox window would not all of a sudden embed itself on your desktop. Unless that is what you want then you can leave off the ‘^’ and ‘$’.
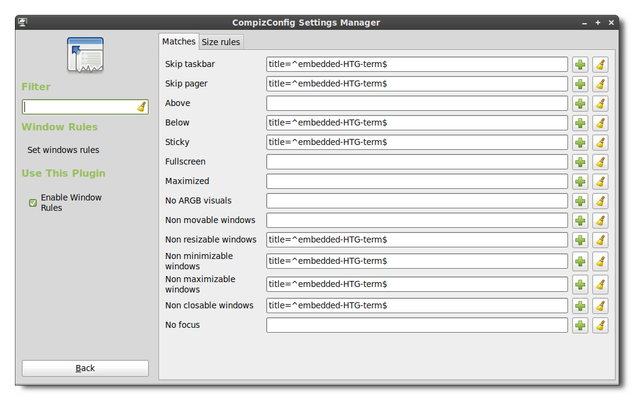
In the window rules plugin add title=^embedded-HTG-term$ to the following options: Skip taskbar, Skip pager, Below, Sticky, Non resizable window, Non minimizable window, Non maximizable window, and Non closeable window.
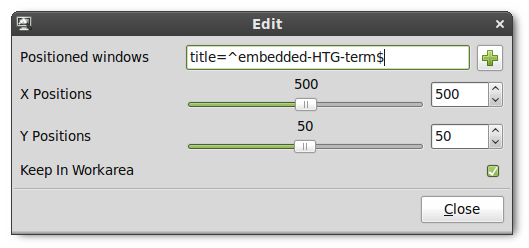
In the place windows plugin click on the “Fixed window placement” tab and then add a new item to the “windows with fixed positions” section. Name the new item title=^embedded-HTG-term$ and set whatever position you want the terminal to be embedded on your desktop. Check the option for keep in work area and then close the window.
Note: Window placement starts in the top left corner of your screen with 0,0 and counts up to the bottom right corner. Your window position will be based on where you want the top left corner of your window to be (eg. 500×500 will put the top left corner of your window 500 pixels from the top and 500 pixels from the left of your screen.) If you do not like your window placement you can always hold Alt and drag the window to a new location with the left mouse button.
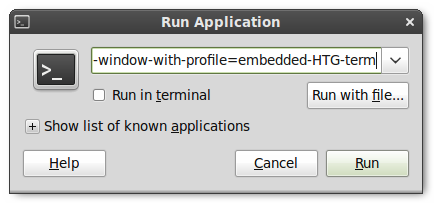
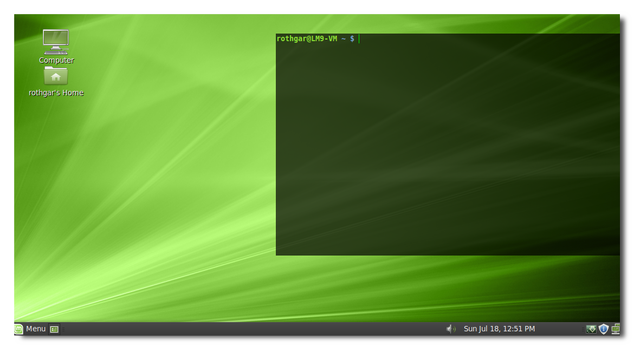
Now you should be able to press Alt+F2 and type in gnome-terminal –window-with-profile=embedded-HTG-term and you should get a terminal window embedded on your desktop background.
Note: although this terminal is “below” all open windows it is still “above” your desktop icons so make sure you move them out of the way. If you need to close the embedded terminal type the command “exit” (without quotes).
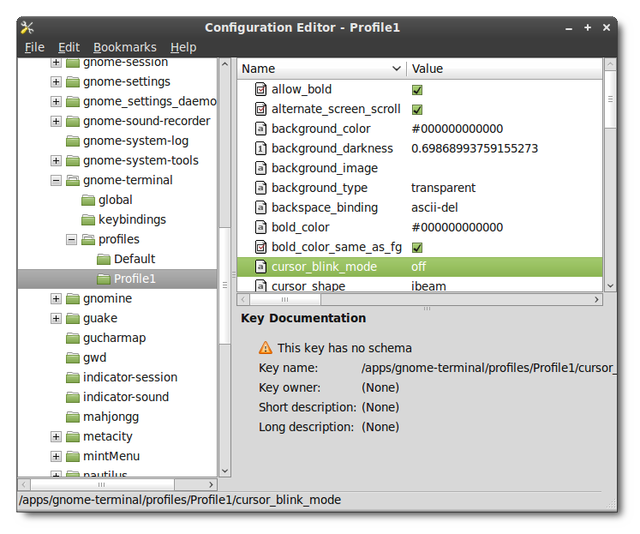
One last optional step if you don’t want a blinking cursor in your new terminal. Open gconf-editor and browse to apps/gnome-terminal/profiles/Profile1/cursor_blink_mode and set the value to “off”. Your profile may be named something different but the key will be in the same place.
And there you have it, four ways to get instant access to a terminal in Linux. With any of these methods you should never be too far away from your ~ away from ~.